Your Cart is Empty


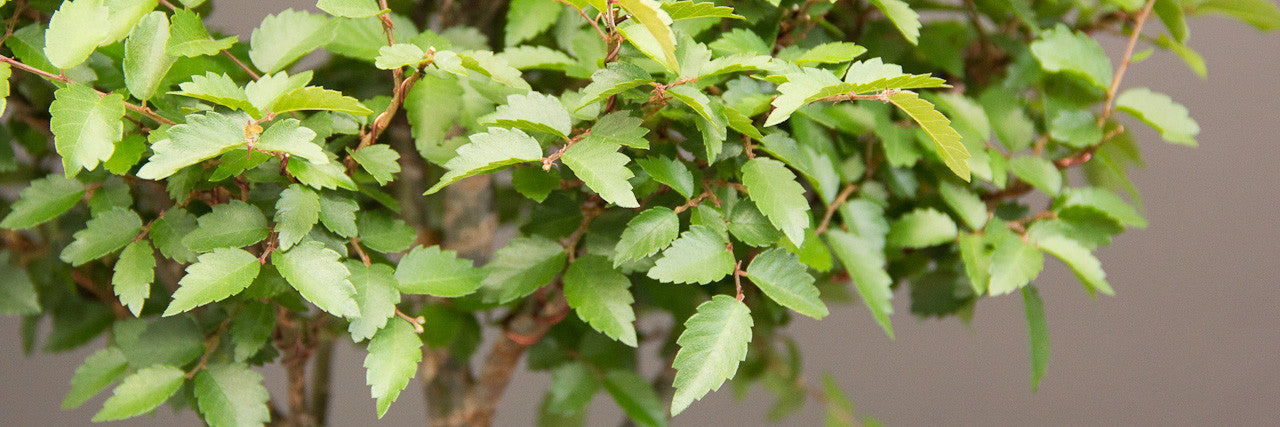

Japanese Zelkova, Broom Style - from humble beginnings
For updates on this Zelkova be sure to check the videos on my YouTube channel.
We all have a story no doubt of a tree which we have developed from very humble beginnings such as a seed, a cutting or a layering. This is one of those stories.
This Zelkova, or Japanese Elm, started out as a cutting which I attained through a swap for a piece of Buddha bamboo. I remembered seeing these amazing broom styled trees in an old publication I have and I immediately thought of styling this little tree in the same manner.
The Japanese Zelkova is almost always styled in a broom style. The reason is that this style is how the tree naturally grows in Japan, and you can see this when driving through the countryside in Japan, from the train window or from a bus, where they are often used as street plantings. (A great book to consider if you are interested in designing trees with formal styles in mind is Charles Ceronio's book on bonsai styles, of which we have the latest version in stock.)
Growing a tree in the style which it naturally forms is like swimming with the current - the tree helps you along the way. In contrast, styling a creeping juniper in an upright style is like trying to swim upstream - the tree fights you at every step. Its possible but perhaps choosing another species would be a whole lot easier?
So what is good design? That's a very simple and innocent question but with a very long and difficult answer. I don't believe I am qualified to answer. However what I would say, in my opinion, is that bonsai should always be designed in good taste. I don't believe highly stylized tree forms are in good taste and I don't think they provide the aura or feeling a more naturally styled tree does.
Bonsai is not immune from fashion trends though. I look at a lot of photos of bonsai; on Facebook, on the internet and especially in Kokufu albums and I try to dissect them, understand what the artist was trying to achieve and how they did so. More importantly I try not to limit my study to technique only, but also to what I like in or about a tree and why. I believe this is a good habit to get into - but don't overlook studying trees in nature.
On with the tree at hand!
First thing I did was to stick the tree in the ground, on top of a tile (See my blog on field growing for more info). Don't be in too much of a hurry to put a tree into a tiny pot, development from then on is certainly going to take place at a snail's pace. Good bonsai cannot be rushed, it takes time, but patience is rewarded.
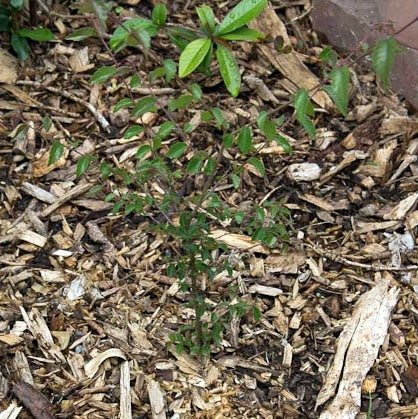
Image caption. This is the Zelkova in 2010 when I planted it into the ground.
As I knew I wanted to style it in a broom style, and that for a broom style one needs a perfectly straight trunk, I kept a very watchful eye on the trunkline to make sure it was just that. Wirewas needed to give it the correct shape and I also tied it to a stake.
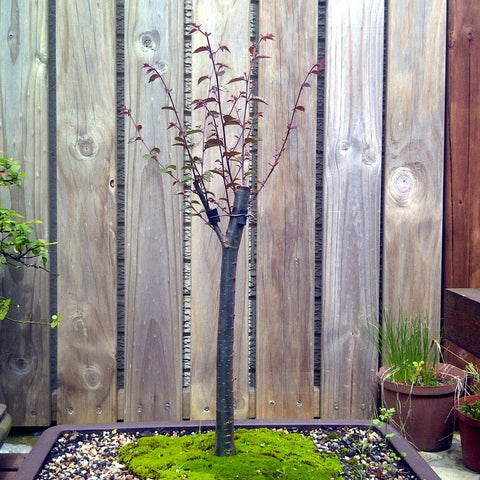
Image caption. The same tree 2 years later.
In the above image you can see that it was not necessary to let the tree remain in the ground too long, as it achieved the necessary trunk girth which I wanted fairly quickly.
I potted it up into a large, flattish bonsai container and began the styling. It seems the very popular way of starting a broom is to chop the trunk straight off using a saw. I chose to develop it a little differently using another method, which was to develop it from a fork in the trunkline. It is a good idea though, for visual interest, not to have a fork where both 'legs' are of the same thickness. If you did use such a fork it might end up looking a little like a slingshot.
Be careful of wire bite on some species. The Zelkova is not a terribly slow healer but it is nothing like the Chinese maple in speed. Wire bite on these trees can taken a number of years to disappear completely due to their thin cambium. Any cuts should be cleaned with a grafting knife and then sealed properly with either a paste or a putty, so the wound will not dry out at all. Where possible, always make cuts towards the back of the tree. In other words when you view the front of the tree you should not be able to see any scarring.

Image caption. After wiring in 2013.
The focus now is to create the foundation for the future shape. You will notice if you study trees growing in the broom style in nature, all the branches grow towards the sunlight. This is particularly the case in younger trees. In older trees you will find the branches begin sagging. So if you want to create a young looking tree or an old one, bear this little fact in mind. I'm going for a healthy looking, young tree. So all the twigs need to be wired to shape. Keep the wire on only as long as is needed to have these branches grow into position, and then remove the wire. Depending on the health of your tree, this might be a month or it might be a few months.
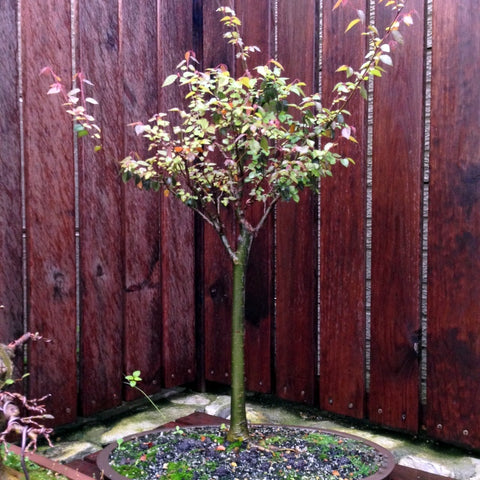
Image caption. August 2014, and the tree is beginning to fill out a little.
The wonderful thing about ramification is that it develops at an exponential rate. Initially you begin with 2 branches, these 2 become 4, which become 8 and so on. This is why when you grow deciduous trees, in the beginning the going is slow, but before you know it you are having to eliminate branches as they are blocking too much light.
Notice also the nebari. I'm a little pedantic about roots, and I cannot understand why some people don't even seem to notice them. For me it is one of the most important features of a mature tree. It must have mature roots which appear to be hugging the soil and which make the transition between soil line and trunkline, smoothly. The roots of a broom style tree are probably more important than in most other styles. This is why most, if not all, broom styled trees start out either as a layering or a cutting. All the roots must emerge from the trunk at the same height, and they must radiate in all directions. To all you "rule breakers" out there; this is not a rule, it just looks good/right and if you were to put a broom with good roots next to one which has bad roots you too would agree with me.
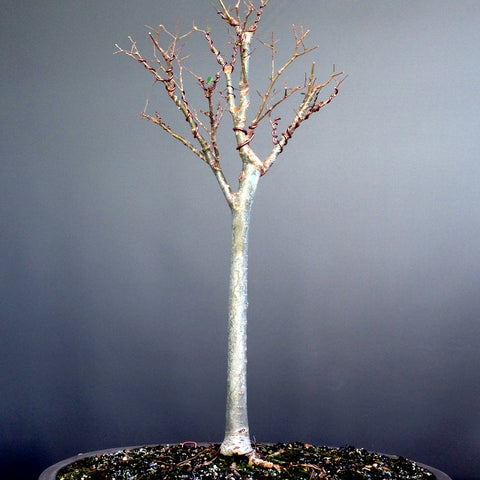
Image caption. December 2014.
Some of the branches have thickened up a bit and ramification has increased a bit. If you want a delicate branch structure, as I do on this tree, you need to be very careful not to allow the new growth to develop too long or it thickens too much and you have to eliminate it and begin the branch again. In time all branches on all trees will thicken to a point at which you need to remove them and rebuild the tree from the foundation. This is why taking time to build a good foundation is so important. Part of this good foundation which I refer to is ensuring you have internodes appropriately spaced apart. I dealt briefly with this topic in this blog on maples. In essence I mean that you cannot have internodes 5cm apart {as a result of excessive feeding or insufficient sunlight} in the outer extents of the canopy, although perhaps in the inner parts of the tree that might be ok. This is because as you near the outline of your tree you need an ever increasing number of forks in the branches to achieve the fine and delicate twigs which for me is the allure of deciduous trees.
Another technique which is applied at least twice each season to this tree to accelerate the rate of development of the ramification is defoliation. I always do a complete defoliation of this tree but if a tree is not strong enough then a partial defoliation would be preferred.
Once the leaves are removed, I can see which branches need to be removed and which need to be wired. At this stage I am beginning to practice clip and grow more and more so I trim using a narrow trimming scissors, back to a dormant bud positioned in the direction I want the new branch to grow. As a result of this sudden increase of light into the tree and the pruning, hundreds of new little shoots will emerge from dormant buds all over this tree. Some will be rubbed off and others will be allowed to develop. Repeating this procedure several times in a single season is like have 3 or 4 springs in a year. Make sure your tree is healthy however as defoliating a tree completely will knock it back a bit. I use BonsaiBoost extensively on all my trees, regardless of species and I supplement this too with a liquid organic feed like a Seagro or Sea Secret.
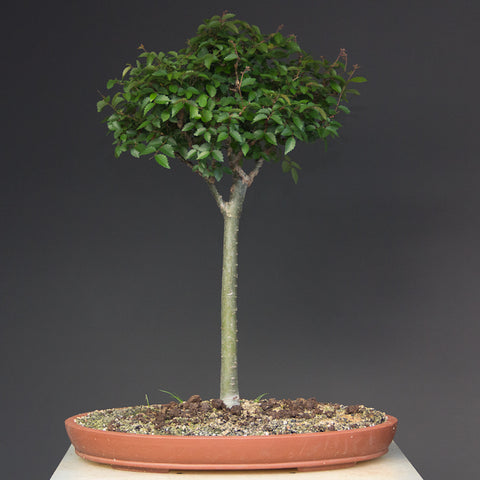
Image caption. The tree as it looked in December 2015.
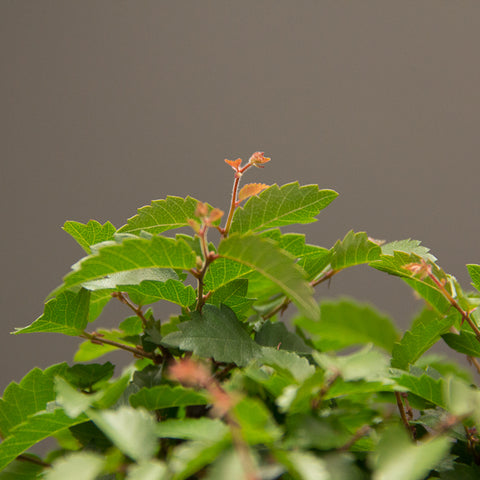
Image caption. New shoots pushing from the canopy
When a tree achieves the size you are happy with, maintenance becomes the art. Although this tree is by no means at that point one needs to be cautious of allowing these new shoots to develop too much as in as little as a week or two this shoot will have extended way beyond the profile of the tree and possibly become too thick to be of any use anymore. However it is important not to keep cutting these shoots as they develop or you will weaken the tree over time. The trick is finding the balance, and usually I will allow such shoots to develop till the leaves harden off.
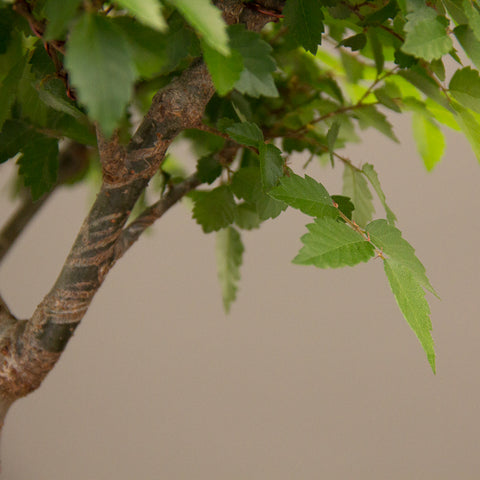
Image caption. Shoots developing downwards should be eliminated.
You will recall that I said I want to develop this tree as a young tree, which means all the branches should be reaching up to the sunlight. Therefore the little branchlet which has developed in the canopy should be removed if it cannot be wired up and allowed to develop as part of the canopy.
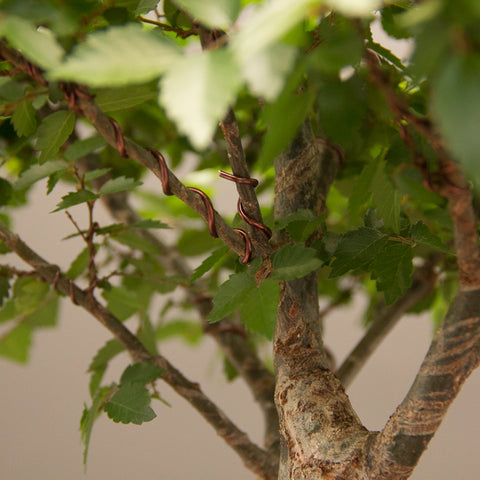
Image caption. Branchlets developing in three's, wire bite and a healed scar.
In one of the earlier photos I mentioned that I chose to develop the broom from a fork in the trunkline. To achieve this I needed to make a rather sizeable cut. Visible scarring is not desirable on bonsai trees as it clearly shows man's intervention. (Of course I am not including scars which become part of the design of the tree.) You can see how well this scar has healed over in a relatively short space of time thanks to treating it properly at the time. On the branch coming towards the camera, you can see the remains of wire bite. These will most likely remain visible on the tree while it is still young, but when the bark ages and begins to peel off these marks will disappear. The point I'd like to make though, is that the tree is still in development and although wire bite on a finished tree is undesirable it is part of the making of a tree so don't sacrifice styling in order to avoid it.
It's unfortunately not that clear from this image but there is a small branchlet developing just where the wire starts at the bottom of the fork. This growth should be eliminated. A branch should fork into two. You will often find in young and energetic trees, that when you defoliate and prune, a lot of new little shoots will form all over the place. If they fork at an existing fork and are allowed to develop this area might become swollen. So it is best to eliminate such growth as early on as possible.
2 Responses

Leave a comment
Comments will be approved before showing up.
Mara Hauptfleisch
February 27, 2016
Love your tutorial. Once again the importance of photographs are illustrated here. The time and dedication is appreciated.Looking at your tree, the first branch will develop in the coming years which is difficult as you well know.
Goodluck.