spend R1000 & 2kg or less = free shipping.
Menu

spend R1000 & 2kg or less = free shipping.

Your Cart is Empty

3 min read
In 2012 I purchased a bunch of bonsai trees from a friend, one of them was this Celtis sinensis (Hackberry) which I decided to ground layer. If you have not yet read the previous posts on this tree; part 1 and part 2 then I would suggest you do so before proceeding with this 3rd part.
After the tree spent the last growing season in the wooden box which I had made for it, I decided to move it over into a shallow bonsai container. For the past season the goal was to encourage the newly formed roots to develop as much as possible and to mature a bit; as they are extremely fragile when you first separate the layering from the parent or donor tree.
The purpose or reason for moving it over to the shallow bonsai container is so that these roots can only grow in a horizontal direction if they want to extend. This action results in them fattening and improving the nebari in the long run.

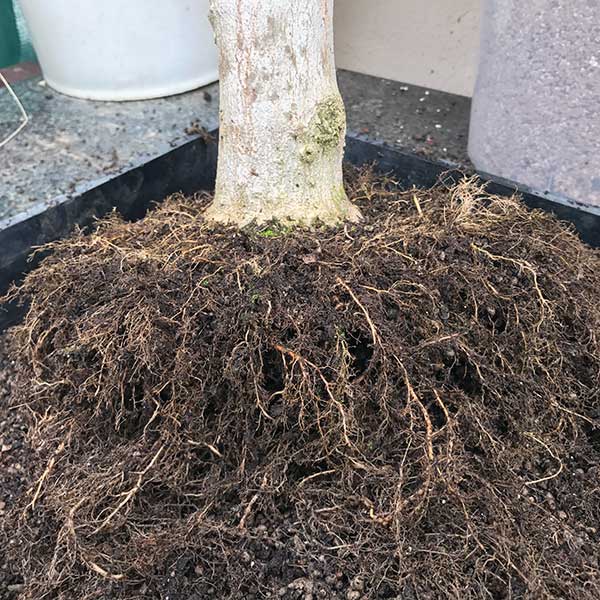
As you can see in the image, the roots developed very well over the past season. They are very healthy and are precisely the type of roots we want in a container; the fibrous feeder type of root and not the thick storage roots. The formation of these roots are thanks to the growing medium, which in this case was the Professional mix and liberal use of BonsaiBoost.

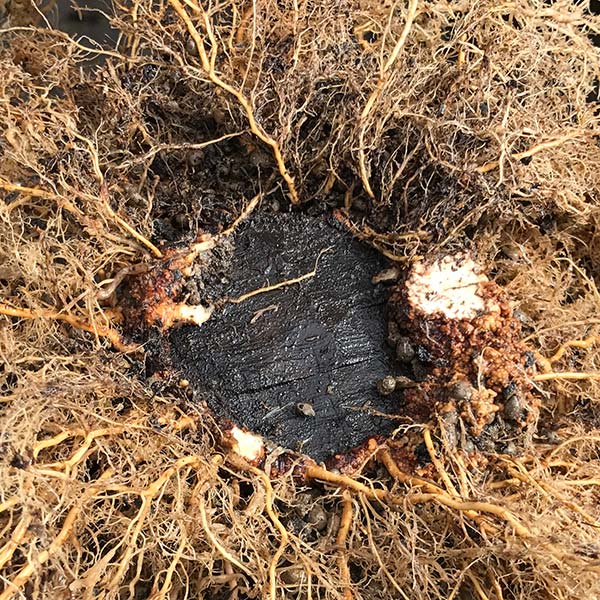
From below you can see where the layered tree was separated from the donor or parent plant. It has healed or calloused over very well and in fact I reduced a bit of the callous in an effort to keep this surface as flat as possible; which will also enable me to get this tree into as flat a container as possible.

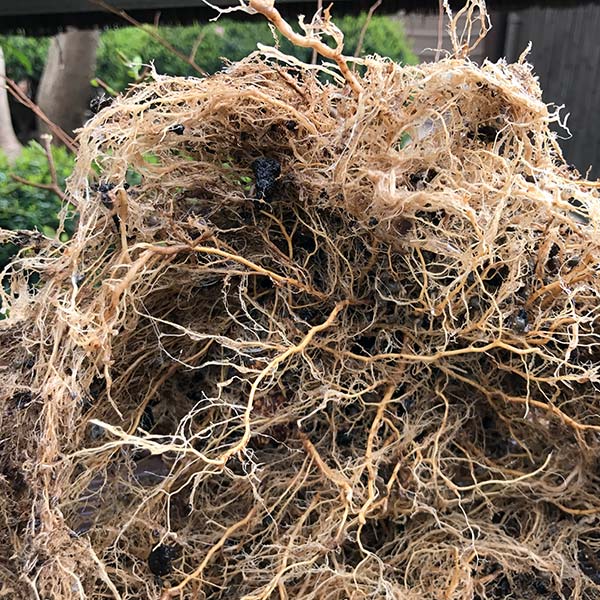
I then eliminated all the roots which were growing directly downwards and allowed only those growing horizontally to remain.
For the broom style, the style in which I am developing this tree, it is very important to have the nebari right. This is the reason I layered the tree to begin with. So every time you work on the roots of a tree you need to sort them out or comb them out so that they radiate out from the trunk in all directions.

Using sharp scissors, which I have set aside for root work, I trimmed the roots back giving them a nice haircut so to speak. This is not merely cosmetic, just as trimming branches results in ramification so does the trimming of roots. You don't want long continuous roots, you want roots to extend then fork, extend and then fork again. As this increases so does the quantity of growing tips and it is these tips which take up nutrients which can then support more ramified trees.
It is best to do root work in the shade and when necessary mist spray them because if allowed to dry out they will be dead and you may lose the tree.
I got my container ready and threw down a layer of growing media; akadama and pumice in a 2:1 ratio. I then test fitted the tree working it into the slight mound which I had made in the middle of the pot.
This was the next step I completed; I untangled the roots which were growing across others or just extending in any direction other than where I wanted them, which was outward. If necessary you can even wire roots into the correct position. Sometimes a stone or piece of wood is sufficient to adjust the root.
Whatever method or technique you employ, time spent on correcting the nebari now will be time well spent in the greater life of the tree as a bonsai.
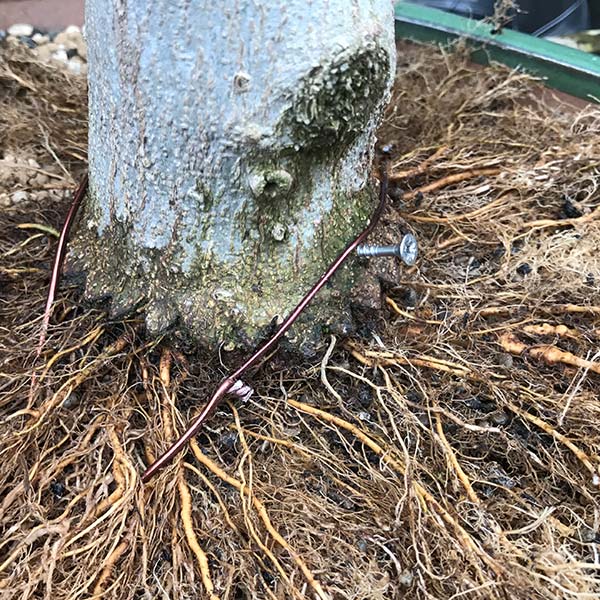
To ensure there was no movement in the tree I also worked stainless steel screws into either side of the trunk so that I could anchor my wire onto them, given that the roots are still not stiff enough to fulfill the task. Once the need for the screws has passed I can easily remove them and the tiny hole they leave will heal over in no time.

Once completing the above steps I watered the tree well and placed it in a position fairly sheltered from wind and where it will receive morning sun. It will not receive any fertilizer for the next 2 to 3 weeks until I can see that it is growing well. Then I can progressively move it into more sun. Watering also needs to be adapted as it will consume less water now that I have reduced the volume of roots considerably.
Enjoyed this blog on Hackberry bonsai? Here are some more on the subject.
Comments will be approved before showing up.

Exclusive Offer: Buy 2 Venus Fly Traps, Get the 3rd One FREE - Limited Time Only!
Add three, six, nine or any other multiple of three of our hungry fly traps to your cart and the discount is automatically applied.