bonsai
gardening
Orchids
2nd Defoliation of a Chinese Maple
5 min read
A few weeks ago I defoliated this maple and it was featured in a blog post. As it had grown strongly again and the wire I applied at that time had begun to bit in, I thought it was time to repeat the process.
As you scroll through the images I have made some comments along the way to explain what and why.
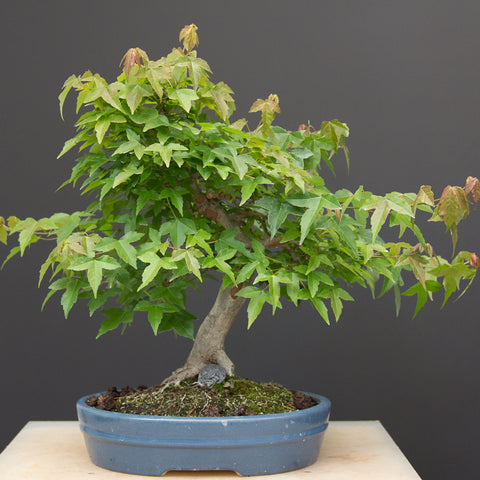
Image caption. Here is the maple before we defoliate it.
As you can see, it has recovered well from the previous defoliation and styling. The branches which we did not eliminate the tips of, have extended further. The leaves have hardened off and are leathery to the touch. Based on the trees strength it is safe to go ahead and repeat the process. And we can repeat the process as many times in one season as the tree will allow. Each time we do this we increase the ramification of the tree, hence this is a very good technique to use for achieving ramification in as little time as possible.
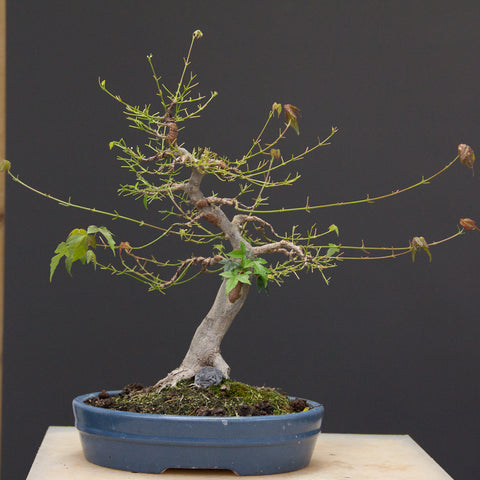
Image caption. The tree without leaves revealing the inner structure.
Now that all the leaves have been removed we can see what is happening and where we need to work.
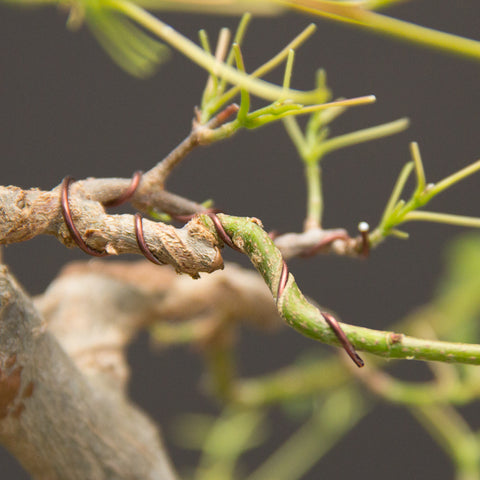
Image caption. Wire bite
People in general seem to be very "scared" of wire bite. Although it is true that on some species such as azalea and japanese maple, scarring left by wire bite can take a very long time to disappear, on a young Chinese maple like this it is really not something to be concerned about. It is quite normal for wire to bite in as we are after all wiring in the growing season. Some people use this as justification for wiring in winter when the tree is dormant. However as you are essentially making microscopic breaks in the branches, these need to heal and this is not possible in winter as there is no sapflow.
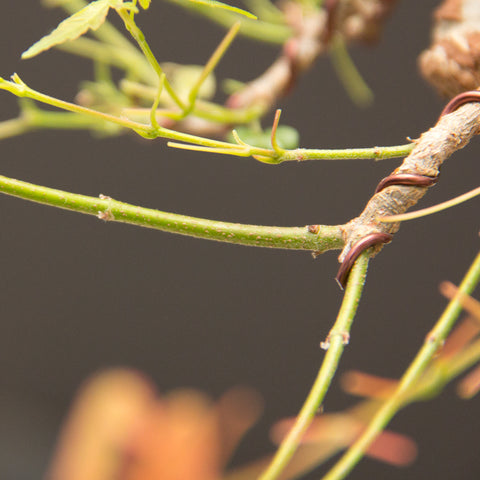
Image caption. More wire bite and internodes
On the older wood, you can see that there is some wire bite also. In very severe cases you can actually cut the ridges which remain after you have removed the wire and seal them. These will callous over in no time. Also, to remove the wire it is best to do so carefully by unwinding the wire and not attempting to cut it off with a wire cutter as it will damage the surrounding tissue.
You can see a set of dormant buds close to the woody branch and then a very long section before you get another set of buds. Its extremely import to know that no matter what you do you will never get anything to grow between these sets of buds. Depending on where this is on the tree and how close it is to the outline of the tree, this sort of internodal distance might be acceptable or it might be too long, as it would result in coarse ramification and not the fine, delicate goal we are after.
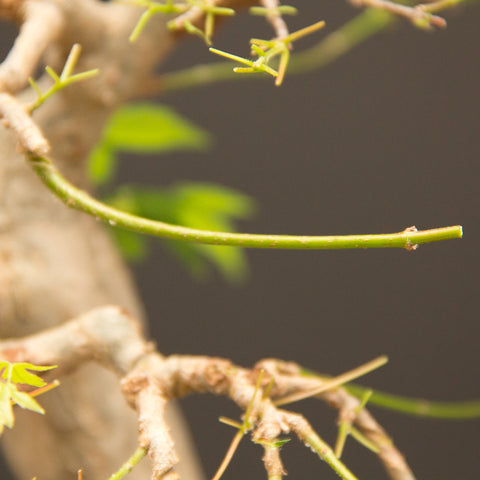
Image caption. More long internodes
Here is another internode which is most likely too long. Such internodes are not necessarily as a result of anything you have done wrong, it is just the normal growing habit of strong species such as the trident maple. However, excessive internodal distances may also be attributed to too much fertilizer. So its important that after doing a treatment like this that you do not immediately feed too much or you will lose much of what you gain as you will need to cut it off. This is why I find BonsaiBoost works so well. It is a slow release organic fertilizer, working for up to 2 months. So it does not rapidly release all its nutrients but rather does so slowly and therefore does not result in a growth spurt as such.
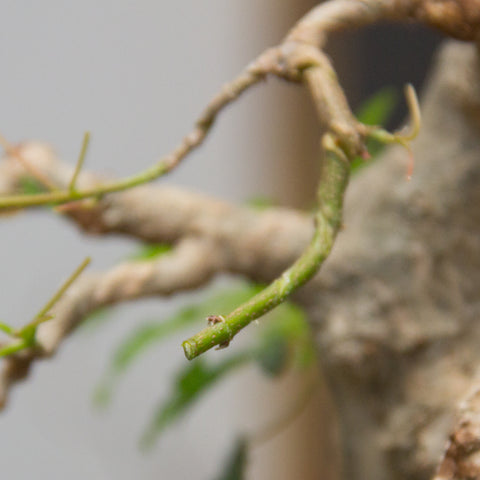
Image caption. Shortening the branch
Here I have shortened the branch a bit to a set of internodes. But is the distance between the previous set and to where I have shortened it still too long?
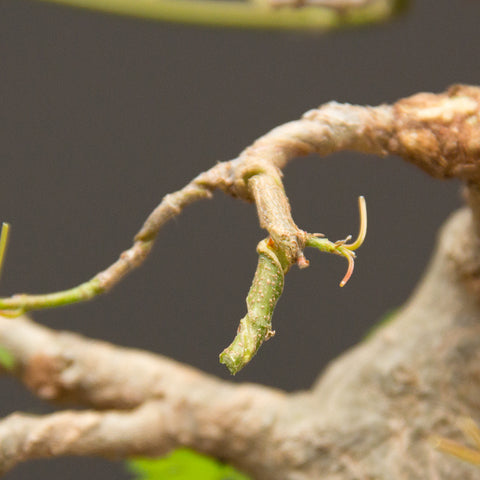
Image caption. Further shortening
Yes, you're right! It was still too long and I decided to remove the other internode. Now we will see what the tree decides to do. It will most likely now shoot from both sides of the branch at the currently dormant buds. We may keep only one of these though as too many forks in the branches too close to one another gets a little crowded.
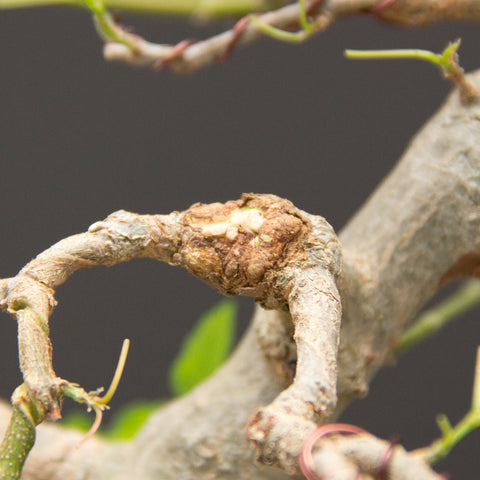
Image caption. Callousing of cuts.
When you make a cut with a branch cutter; when you remove a branch or some other growth, it is best to do so with clean and sharp tools. Afterwards you may want to go over the edge of the cut, especially if it is quite large, and clean the edge with a blade or grafting knife. This will ensure the fastest healing possible. Importantly though it is a must that you seal the cut with the appropriate sealer. If not the tissue will dry out, the sap will recede and the scar will take longer to heal over and will be bigger than what it could have been. This cut was made when we previously worked on the tree a few weeks ago. By sealing it we have ensured that in this short period of time it has almost healed over 100%.
The choice of tool also greatly affects the shape of the final wound. If you use a branch cutter it leaves a flat cut, so for fast callousing trees the resulting tissue will be swollen. You can use a knob cutter to make the final cut, after using the branch cutter as this will be concave, so the final shape of the wound will be level. There is now also a combination tool which combines the branch cutter with knob cutter, its called a rounded or concave branch cutter and makes quick work of removing branches.
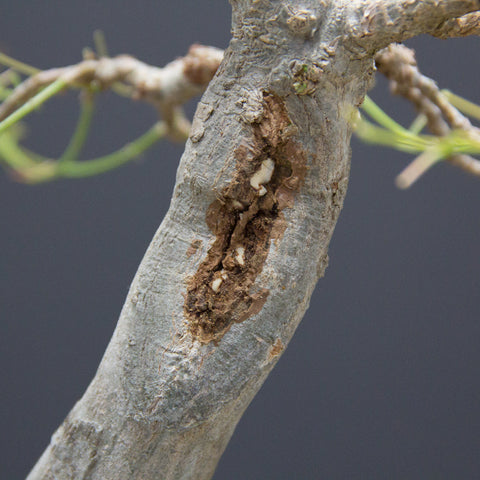
Image caption. Healing over of the trunk scar.
This large scar in the trunk was also worked on previously. I used a blade to remove a little of the bark on the inside of the scar, this reactivated the area and kicked it into healing mode again. I then sealed the cut completely. As you can see it has also healed over 100% in only a few weeks.
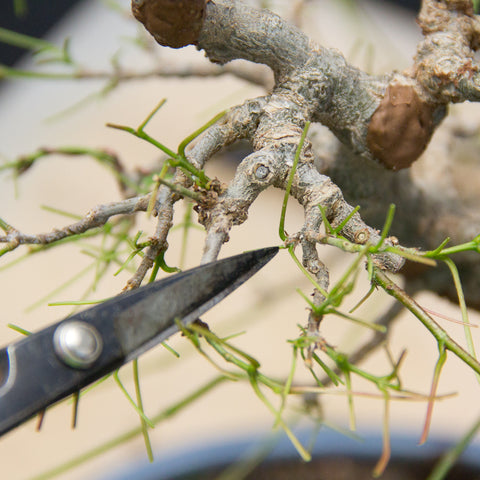
Image caption. Removing superfluous growth.
Your tree might pop out little shoots all over the tree as a result of the previous pruning. The ones which you don't think can be used in the future in the design of the tree can be removed as they will simply take away energy from the tree. We want maximum growth to go into the branches we want to keep at this stage. A trimming scissors is best for this sort of work as it is thin and allows us to get where we need to be without damaging surrounding growth.
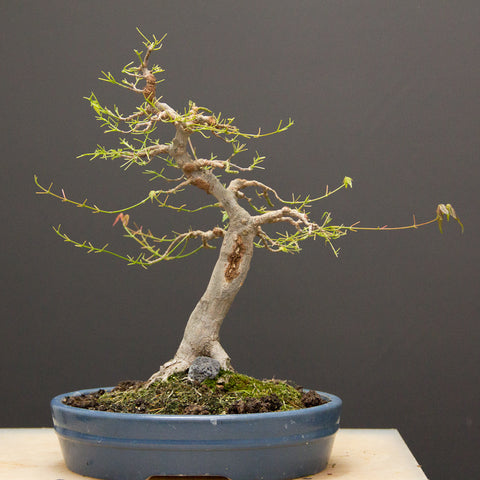
Image caption. The end result.
You can see that some branches were left to grow even longer and thicker as we need more girth at the base of those branches. It was not necessary to wire anything again at this stage but if so, then I would have wired the branches that needed it.
There are a couple bare patches on the tree where I would like to have done an approach graft or two but there were no long enough branches to do this with, however the timing would have been right to do it.
So now we will feed lightly again with BonsaiBoost and allow the tree to fill out with leaves and regain strength. Depending on the vigor of the regrowth we might be able to defoliate again this season. Bear in mind that you should always let the tree tell you what it can handle, and don't simply follow a schedule blindly.
8 Responses
Anonymous
November 20, 2015
Viky, thanks for your question! Yes partial defoliation is something I practice also particularly when the tree is weak for instance if for some reason it has sustained a knock, or if I have recently repotted. Sometime you will find that the apex is too strong and the base weakening, then I would only defoliate the apex for instance. There is, as is often the case in bonsai, many more ways of doing things than one. I think it is quite acceptable to do partial defoliation, full defoliation’s in some areas or fully defoliate the entire tree. The thinking should rather be one of “What do I want to achieve?” “What is the correct technique to apply to achieve that goal?” and “Is this the right time to do it?”
Viky Petermann
November 20, 2015
Great article Terry! I was just about to defoliate this weekend again too. Do you ever do partial defoliation? I find the older the maples get the more I tend to only remove large leaves and open the canopy so as to let light through. How do you feel about this?
Shaun
November 20, 2015
Great thanks Terry – Please, If you have any info regarding olives in shock/dormancy – I’ve been advised to use brewers yeast which I apply every 4 weeks or so. These trees have shown no signs of recovery in over a year already. Still green however if the bark is scratched.
Anonymous
November 19, 2015
Ha ha, glad you found yourself then Shaun. Let me know about any specific topics that you’d like me to deal with in future blogs.
Shaun
November 19, 2015
Terry, I’d be lost without these articles!
Anonymous
November 19, 2015
Thanks Brett. I might have done this one a little early in fact but I wanted to have the pics in time for this blog, so this weekend might have been better. Yes, 6-8 weeks is a good timeframe to work with. I don’t think repeating this procedure more than 3 times in a single season is likely. Given that in the Cape trees tend to slow down a lot in the hottest months of summer, and that these months seem to be shuffling around a bit, I would probably say that December/January would be the latest. In autumn when the leaves just begin to change colour is when I would do my last pruning on maples, as I don’t work on deciduous trees in winter.
Brett
November 19, 2015
Great article. I am about to do mine for the second time this weekend. Was just waiting for the leaves to harden off as you say. I agree that the tree tells you when and how many times you can defoliate in a season, but in your opinion when do you think the latest is that you can defoliate, i.e. time of the year.
The tree would need to grow new leaves and harden off which is normally about 6-8 weeks..?
Brett
Leave a comment
Comments will be approved before showing up.
Recent Articles
-
Enthusiasts Top Wiring Tips
July 17, 2023
-
Top fertilizing tips
March 28, 2023
-
Top watering tips
February 13, 2023
-
Creating Japanese Maple forests
October 24, 2022
-
How to dig bonsai material
August 15, 2022
-
How I style bonsai and you can too
April 30, 2022
-
Swamp Cypress Bonsai Styling
July 03, 2021
-
How to hide large scars quickly
June 14, 2021
-
14 Tips for Field Growing Bonsai
May 31, 2021
-
Aquaria: An Introduction
January 06, 2021

Join now! Get R100
Expert Tips & Be the First to Know
Join our community, receive our best content, including seasonal tips, be the first to know of back in stock and new product launches.


Anonymous
November 20, 2015
Hello Shaun, I know you might think me biased as its my product but if you don’t have any BonsaiBoost then get some. Use it liberally on one or more of the sulking olives as a comparison. I can almost guarantee that in no time they will be budding. Co-incidentally I don’t know what medium you are using but I can strongly suggest our Professional mix as it is a combination of LECA, peat and stone. Being an extremely open mix your tree should do very well. If its in a too moisture retentive mix at the moment this might be a factor and I can strongly suggest converting sooner rather than later to the mix I have suggested (We sell them in 25L buckets also). I have never heard of the Brewers Yeast trick, my mother used to give me that in tablet form to strengthen my nails though so I am not sure how it is meant to produce roots. Perhaps another urban legend??? Sorry, I don’t mean to make fun and I will certainly apologize if someone can show me definitive proof that this works or at least explain why, horticulturally it should have an effect.