Your Cart is Empty


Before and After Japanese Red Pine
In this post I thought I would describe the process of a recent styling I did on a collected Japanese Red Pine which I imported a year ago from Japan. Detailed in the text is the different considerations made, the work which was done and what steps will be taken to ensure the future health of the tree, post styling.
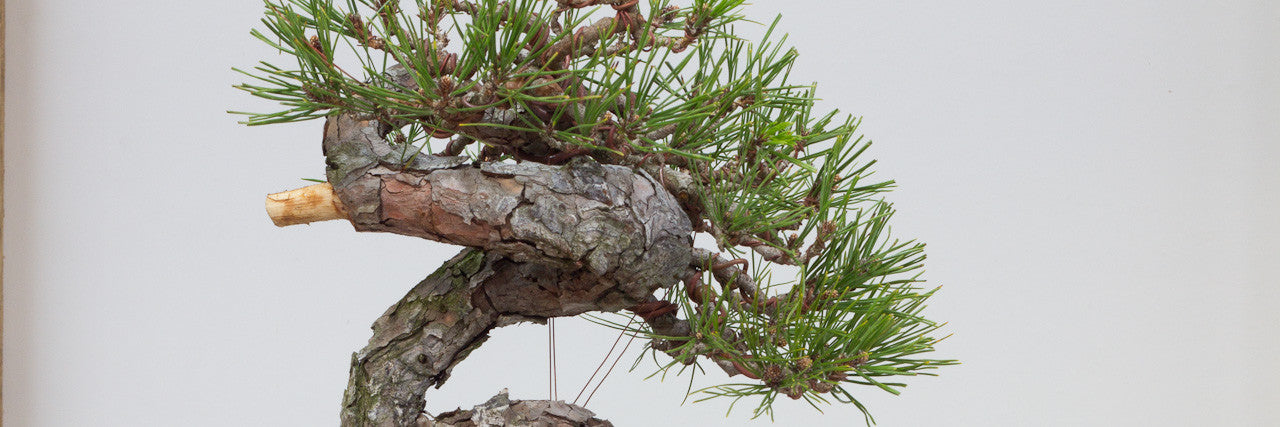
Before Styling

Image caption. The tree as imported from Japan, before styling
In studying the tree above before beginning work on it, I needed to find the angle and styling possibilities which were best for this tree. The coiling trunk line is why I purchased it and thus I wanted to enhance this character by placing the foliage in such a way that it does not hide much and in fact "pushes" the trunk towards the viewer.
This particular tree is a collected specimen and thus possesses qualities which make it unique. It would make no sense to try make this tree into an "orthodox" tree. I needed to consider its history and the emotions or feel it evoked in me, and how I could amplify that through the manner in which the branches were angled, spaced, the density of the canopy and more.
I believe I cut only two branches in this styling exercise. The one is obvious, its the large branch which has now been reduced to a jin. I removed that branch as it was the same thickness as the trunkline, it was also as straight as an arrow and there is no way it could be bent, it would simply have snapped right through. The other was a relatively obscure branch which was too long to fit within the outline of the tree. In this particular case, the species being an old Japanese Red Pine, the branches become very brittle and snap easily. I did have a couple breaks and although I sealed them well I may still lose some. If I do I will have more branches to fill in the holes created.
It may look like I did some major work in fact all I did was wiring. What appears to be a repot was in fact only me changing the angle of the tree in the pot. This was possible only as the tree had not filled the container with roots yet (as I potted it up when I imported it). This type of wiring is best done on pines during winter dormancy when sap has stopped flowing or you will find the cambium separating from the wood underneath - leading to a dead branch.
Other than fertilizing this tree in the coming season no further work will be done to it. The wire will stay on until it is clearly biting in, and all growing tips were slightly tilted towards the sun to strengthen them. There is sufficient space for the roots in this pot and the growing medium structure is fine, allowing for good drainage (very important indicator of the need to repot). For now its in a low wind spot, exposed to as much sun as one gets in the W.Cape in winter!
After Styling
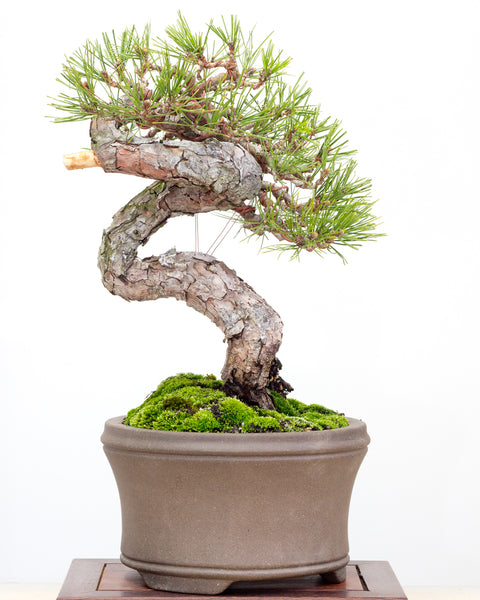
Image caption. After styling.
2 Responses

Leave a comment
Comments will be approved before showing up.

Terry
August 08, 2015
Thanks Tim. I am quite happy with the result so far also. I am also relieved to see that all the buds are swelling nicely so despite a few scary moments when branches cracked during bending it seems like they will all make it. Hopefully I’ll be able to exhibit this one, one day.